

Creating your own cannabinoid oil is a meticulous process. It involves activating the plant material through decarboxylation, washing it with a solvent like food-grade ethanol, and then carefully removing that solvent to get a potent, concentrated oil. Many people know this final product as RSO or FECO, and it's become a staple for personal wellness routines.
To do this right, you have to be obsessive about safety, start with high-quality ingredients, and follow the steps precisely.
A Responsible Introduction to Crafting Your Own Cannabinoid Oil
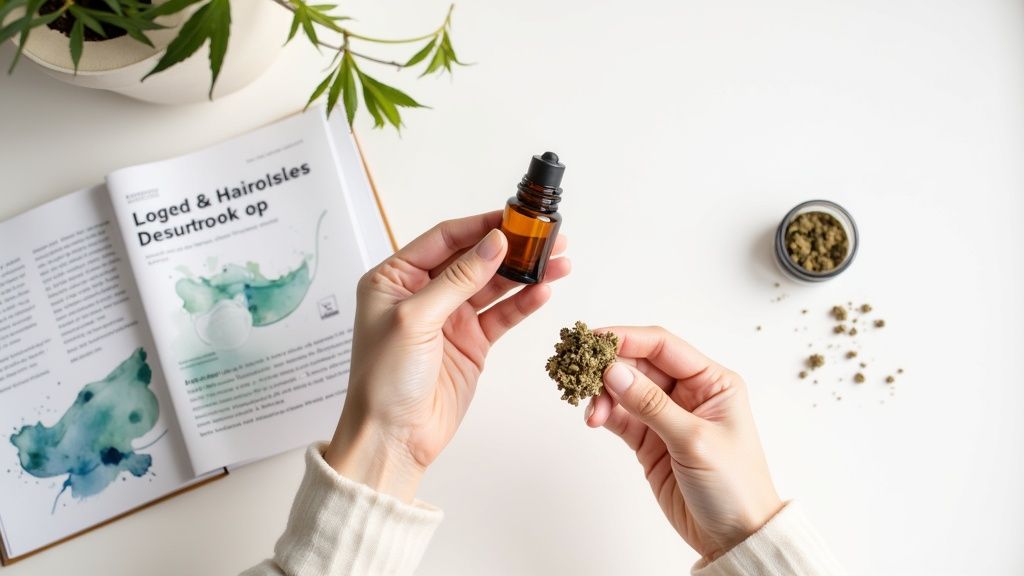
Learning to make your own cannabinoid oil is a big step—it puts you firmly in control of your own wellness. This guide is built to give you the knowledge you need to produce a high-quality oil responsibly, making your well-being the absolute top priority. The entire process we'll walk through is grounded in a safety-first mindset.
The "why" is just as important as the "how." People often decide to make their own oil to get a specific purity and concentration that they can't find elsewhere, tailored perfectly to their health goals. When you manage the entire process yourself, you know exactly what’s in your final product.
The Foundation of a Safe and Successful Process
Before we get into the step-by-step, let's establish a solid foundation. This is more than just gathering supplies; it's about adopting a mindset of diligence and respect for the powerful materials you're working with.
Your success really boils down to three core principles:
- Prioritizing Safety: You'll be working with flammable solvents like ethanol. This means you need excellent ventilation and a workspace completely free of open flames or sparks. I can't stress this enough—never underestimate the importance of a safe environment.
- Sourcing Quality Materials: The quality of your starting plant material will directly determine the quality of your finished oil. It’s a simple rule: good in, good out. Always start with the best you can get.
- Understanding Your Personal Goals: Take the time to understand why you are making this oil. Responsible crafting starts with being informed and focused on your well-being.
The interest in making cannabinoid oil at home is part of a much larger trend. The global CBD oil market alone is projected to grow from USD 0.8 billion in 2025 to USD 12.5 billion by 2035. This massive growth is being driven by people looking for more natural health remedies, a movement that gained huge momentum after the 2018 U.S. Farm Bill.
A well-informed approach is the key to producing a beneficial oil. Understanding not just the steps, but the principles behind them, transforms the process from a simple recipe into a mindful practice for personal health.
For those looking into this for serious health reasons, digging deeper is crucial. Many find value in resources that explore the applications of these oils. You can learn more about RSO for health support on our site. Here at RSOhelp.com, our mission is to provide the clear, safety-focused guidance you need to feel confident in your wellness journey.
Choosing Your Equipment and Solvents for a Safe Extraction
The quality of the oil you end up with is a direct result of the tools and materials you start with. Picking the right equipment and, more importantly, the right solvent isn't just a matter of getting good results—it's the foundation of a safe process and a clean final product. This is where you set yourself up for success.
When you're first figuring out how to make cannabinoid oil, the setup might look a bit intimidating. The good news is that you probably have a lot of the necessary gear in your kitchen already. The rest are simple, specialized tools that make everything safer and more efficient. The main goal here is to create a workspace that’s smooth, controlled, and well-ventilated.
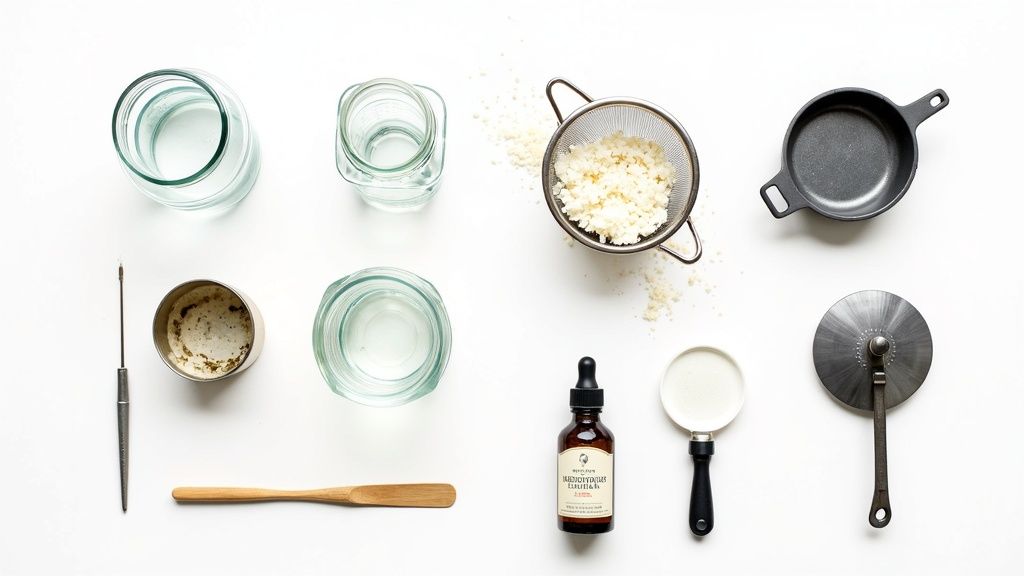
Assembling Your Essential Toolkit
Before you even think about starting the process, get all your gear together in a clean, organized space. Having everything ready and within arm's reach means you won’t be scrambling later, which is when mistakes happen. It’s like mise en place in cooking—proper preparation is everything.
Here’s a look at the core equipment you'll need:
- Glass Jars or Buckets: You'll need a large, food-safe container for washing your plant material. I always recommend glass because it’s non-reactive and a breeze to clean.
- Fine Mesh Strainers or Cheesecloth: Essential for filtering the plant material from the solvent after the wash. A pro tip is to line a strainer with a few layers of cheesecloth for a really effective two-stage filtration.
- Rice Cooker: A simple, cheap rice cooker is the go-to tool for evaporating the solvent. Under no circumstances should you use a gas stove. Look for a cooker with just a "warm" and "cook" setting. It absolutely must be used outdoors or in a space with powerful ventilation.
- Ventilation Fan: This isn't optional; it's a critical safety tool. A strong fan positioned to blow fumes away from your evaporation setup is your best defense against the buildup of flammable alcohol vapors.
This basic setup will get the job done well. A few other things that make life easier are silicone spatulas for scraping up every last drop of oil, stainless steel measuring cups, and a few oral syringes for collecting and dosing the finished product.
The Critical Choice of Solvent
The solvent's one and only job is to strip the cannabinoids and terpenes off the plant material. This makes your choice of solvent the single most important decision in this whole process. It has a massive impact on both the safety of your setup and the purity of your final oil.
For anyone doing this at home, the clear and responsible choice is food-grade ethanol. Ethanol is fantastic at pulling out a full spectrum of compounds. More importantly, it’s significantly safer than the alternatives, as long as it’s completely purged. You're looking for something that is at least 95% pure (190 proof), which will ensure you get an efficient extraction and that it evaporates cleanly.
Remember, the solvent you use becomes an ingredient in your oil. Always, always stick with food-grade options. Industrial solvents can be tainted with toxic denaturants and other contaminants that have no place in a product you’re making for your health.
You’ll see other solvents like isopropyl alcohol mentioned online, but they come with serious risks. Isopropyl alcohol isn't meant for consumption and can leave behind toxic residue if you don’t have professional lab equipment to purge it properly. If your goal is health and wellness, high-proof, food-grade ethanol is the only way to go.
Solvent Safety and Effectiveness Comparison
Making the right choice of solvent is crucial for both safety and the quality of your final product. This table breaks down the most common options to show why food-grade ethanol is the recommended choice for home production.
| Solvent Type | Safety Profile (Home Use) | Extraction Efficiency | Key Considerations |
|---|---|---|---|
| Food-Grade Ethanol | High | Very High | The safest choice for consumption. Evaporates cleanly but requires excellent ventilation due to flammability. |
| Isopropyl Alcohol | Low | High | Not recommended. Can leave toxic residues and is not safe for ingestion if improperly purged. |
| Naphtha/Petroleum Ether | Very Low | High | Extremely dangerous. Highly flammable, toxic, and should never be used in a home setting. |
As you can see, the risks associated with solvents other than ethanol are simply not worth it for a DIY setup.
By being meticulous about your tools and choosing a safe, food-grade solvent like ethanol, you're creating the best possible conditions for producing a clean, high-potency oil. This careful prep work is the first—and most vital—step on your journey.
A Practical Walkthrough of the Cannabinoid Extraction Process
Alright, with your gear sorted and your workspace prepped, it's time to get into the heart of making your own cannabinoid oil. This isn't just a recipe; it's a process that demands respect, patience, and a sharp eye for detail. We're about to turn that plant material into a potent, concentrated oil.
What follows is a breakdown of the key stages, from activating the plant’s compounds to the final, careful removal of the solvent. This is where theory meets practice, so let's walk through it with a focus on safety and quality.
The First Crucial Step: Activating Your Cannabinoids
Before a single drop of solvent touches your plant material, you have to "wake up" the cannabinoids. This is done through a process called decarboxylation, and it's non-negotiable.
Raw cannabis is full of cannabinoid acids, mainly THCA and CBDA. These are the precursors to the compounds we want, THC and CBD, but they aren't fully active in their raw state. Decarboxylation is simply the application of gentle heat to convert them into their active forms. Think of it as flipping a switch—if you skip this, you'll end up with a weak, ineffective oil.
Here’s how to get it right:
- First, break up your starting material. You’re aiming for small, pea-sized pieces, not a fine powder. Grinding it too fine will create a sludge later on and make filtering a nightmare.
- Spread the material in a single, even layer on a baking sheet lined with parchment paper.
- Pop it into an oven preheated to 240°F (115°C). Let it bake for about 30-40 minutes.
- Give it a gentle stir every 10 minutes or so to make sure everything heats evenly. It’s done when the color turns a light golden-brown and your kitchen smells distinctly toasty.
- Let it cool completely before you move on to the next phase.
The Alcohol Wash and Initial Filtration
Once your material is decarbed and cool, it’s time for the solvent wash. This is where the food-grade ethanol gets to work, stripping the cannabinoids and terpenes you just activated from the plant matter.
In your large glass container, combine the decarboxylated material with the high-proof ethanol. Use enough alcohol to completely submerge everything. Now, stir the mixture gently but thoroughly for about three to five minutes. This short wash is intentional—it’s long enough to pull out the good stuff (cannabinoids, terpenes) but short enough to leave behind the less desirable chlorophyll and plant waxes that can give the oil a harsh, grassy taste.
Next, you need to separate the infused alcohol from the spent plant material. Pour the whole slurry through a fine-mesh strainer lined with a few layers of cheesecloth, collecting the liquid in a clean container. Give the cheesecloth a gentle squeeze to release the last of the liquid, but don't go overboard. Squeezing too hard can force unwanted plant fats and lipids into your wash.
Pro Tip: For an even cleaner result, many experienced makers do a quick second wash. Just pour a small amount of fresh ethanol over the already-strained material in the cheesecloth and strain it again into your main collection jar. This helps capture every last bit of the good stuff.
Safely Removing the Solvent
Pay attention, because this is the most hazardous part of the entire process. Your goal is to gently evaporate the ethanol, leaving behind pure, concentrated cannabinoid oil. This step must be done in an extremely well-ventilated area—outdoors is best—and far away from any open flames, sparks, or ignition sources.
Set up your rice cooker and place a fan nearby, positioned to blow the alcohol fumes away from you and the appliance. Pour your filtered, cannabinoid-rich ethanol into the rice cooker, but don’t fill it more than two-thirds of the way to prevent it from bubbling over.
Set the cooker to its lowest heat setting, usually the "warm" function. High heat is the enemy here; it will degrade the very cannabinoids and terpenes you’re trying to preserve. The alcohol will slowly start to evaporate. As the liquid level drops, you can carefully add more from your collection jar until it's all in the cooker.
The principles here mirror what happens on a commercial scale. The cannabis oil market, valued at USD 1,740.78 million in 2024, is built on these fundamental extraction techniques, though large-scale producers use more sophisticated equipment. While they might use CO2 or other organic solvents, the goal is the same. For home producers using this ethanol method, a run with 500g of material and 1L of ethanol can yield 15-20% oil by weight. Optimized processes can even push CBD potency up to 70%. You can read these detailed market growth reports to see just how big this industry has become.
Identifying the Final Stages of Evaporation
As the last of the ethanol boils off, the consistency of the liquid will change dramatically. The vigorous bubbling will slow down, and the liquid will thicken into a dark, tar-like substance. You have to watch it like a hawk at this point.
A great visual cue is the bubbles themselves. When they become thicker and slower, you’re almost there. Once the bubbling has nearly stopped, carefully lift the inner pot out of the rice cooker. There will likely still be a tiny amount of residual solvent or water trapped in the oil. To purge this last bit, you can place the pot on a very gentle heat source, like a coffee warmer, until all signs of bubbling have ceased completely.
What you're left with is a thick, sticky, and highly concentrated oil. This classic solvent-based extraction creates a very different product from solventless methods. If you're curious about how this oil stacks up against other concentrates, our guide that compares RSO with solventless rosin is a great resource. Your oil is now finished and ready to be collected and stored.
Refining Your Oil and Understanding Its Potency
You’ve successfully extracted the raw, concentrated oil, which is a huge step. But you're not quite at the finish line. Now comes the critical refinement stage—transforming that crude extract into a clean, pure, and predictable final product. This is where we focus on purity, consistency, and getting a real handle on the strength of your oil.
After the initial evaporation in the rice cooker, your oil is thick and sticky, but it almost certainly contains trace amounts of solvent and water. If you don't get rid of these last remnants, you'll compromise both the quality and safety of your oil. This final clean-up is often called “purging,” and it's absolutely essential for a top-shelf product.
This diagram gives a simple visual recap of the main stages we’ve covered.
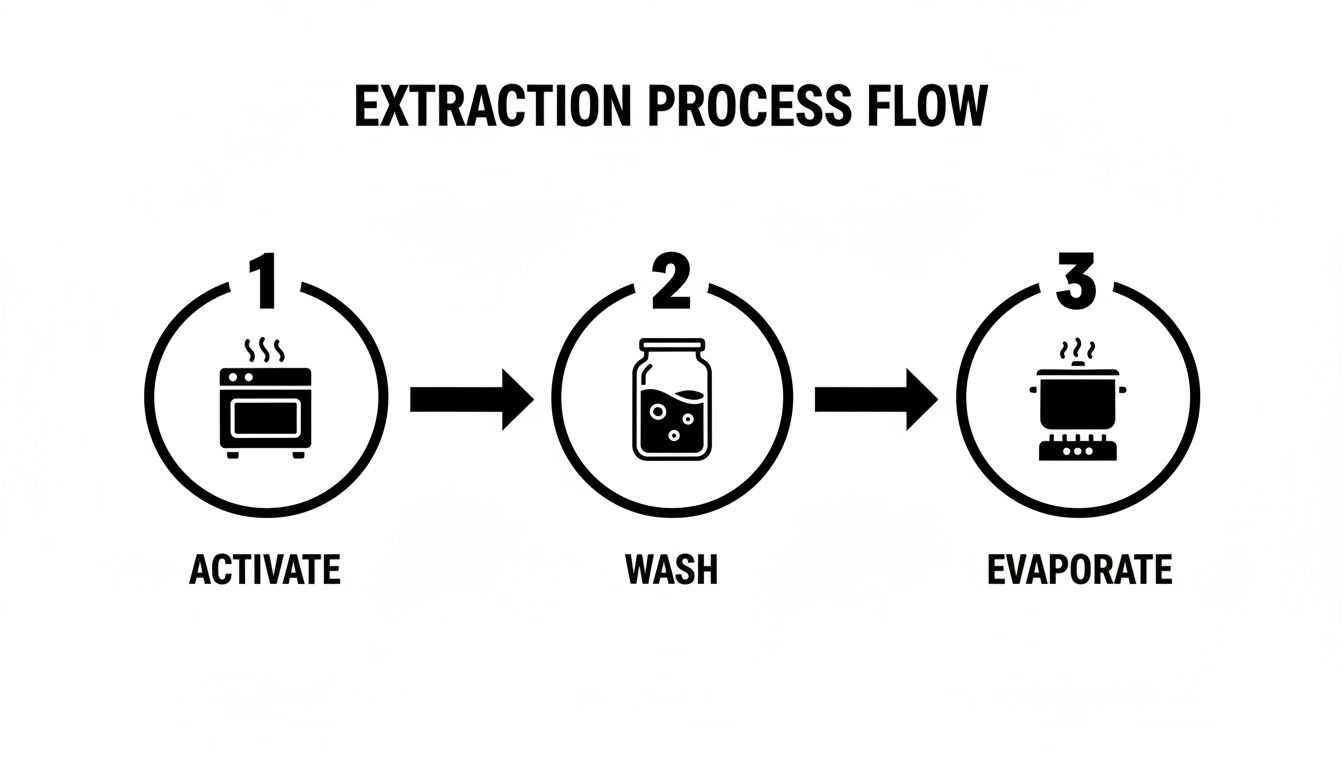
It shows the journey from activation to evaporation, which perfectly sets the stage for the final refining steps we’ll tackle next.
Purging Residual Solvents for a Purer Oil
To purge the last bits of solvent, you’ll need a source of very gentle, steady heat. I've found that a simple coffee mug warmer or a seedling heat mat works perfectly for this. Scrape the oil out of the rice cooker pot and transfer it into a smaller, heat-safe glass container, like a little beaker or a Pyrex dish.
Set the container on your gentle heat source. You’ll start to see tiny bubbles forming and popping on the surface—that’s the last of the ethanol and water evaporating off. This can take several hours, so patience is your friend here. I consider the oil fully purged only when the bubbling has completely stopped for at least an hour.
Getting the Right Consistency and Storing It Properly
Once purged, your oil will be incredibly thick, almost like tar, especially when it cools down. To make it manageable, you can warm it gently right before you’re ready to draw it into oral syringes for storage and dosing. Syringes are ideal; they’re airtight, protect the oil from light, and make dispensing precise amounts a breeze.
Proper storage is non-negotiable if you want to preserve the potency of your oil. Air, light, and heat are the enemies of cannabinoids and terpenes, and they will degrade your oil and reduce its effectiveness over time.
For maximum shelf life, stick to these best practices:
- Use Airtight Containers: Oral syringes or small, sealed glass jars are your best bet.
- Keep It in the Dark: A drawer, cabinet, or box—anywhere away from direct light—will do the trick.
- Maintain a Cool Temperature: A cool room works well, but for long-term storage (several months), the refrigerator is an excellent choice.
The whole point of proper storage is creating a stable environment to stop degradation in its tracks. By controlling these factors, you can keep your oil potent and effective for 12 to 18 months, making sure all your hard work pays off.
Estimating Potency and Why Lab Testing Matters
One of the trickiest parts of making your own oil is figuring out its exact strength. Without professional lab gear, you’re really just making an educated guess. Still, a basic calculation can give you a rough ballpark figure.
Let's walk through an example. Say your starting flower had a cannabinoid content of 20%. If you used 30 grams of it, you had a total of 6,000 milligrams of available cannabinoids (30,000 mg x 0.20). If your final yield of oil is 5 grams (about 5,000 mg), you can estimate the potency. Assuming you achieved about 50% extraction efficiency (a realistic number), you'd have 3,000 mg of cannabinoids in your 5,000 mg of oil, putting your potency around 60%.
Remember, this is a very rough estimate. The only way to know for sure is to get it tested. Sending a tiny sample to a third-party lab will give you a precise report on the cannabinoid profile (THC, CBD, etc.) and, just as importantly, confirm there's no residual solvent left. For anyone relying on this oil for specific health goals, that data is invaluable.
Diluting for Safe and Consistent Dosing
Because this oil is so concentrated, dosing it straight from the syringe is not only difficult but also makes it easy to take too much. The smartest and safest approach is to dilute a small amount of your concentrate with a carrier oil, like organic MCT or olive oil.
This gives you two huge advantages:
- Easier Dosing: Diluted oil is far less viscous and can be measured accurately with a standard dropper bottle.
- Safer Titration: It allows you to "start low and go slow," finding your minimum effective dose without the risk of overdoing it.
For example, you could mix one gram of your concentrated oil with 9 ml of MCT oil. This creates a 1:10 dilution, which makes administering small, controlled doses much more manageable. This kind of responsible use is at the heart of getting the most out of your homemade oil. If you're looking for more guidance, resources like RSOhelp.com can offer clarity and connect you with solid information to support your wellness journey.
Dosing, Storage, and Using Your Oil for the Long Haul
Making your own cannabinoid oil is a significant accomplishment, but how you use and store it is just as important. Getting this part right ensures your oil stays effective, safe, and ready to support your long-term wellness goals. It all starts with a smart, personal dosing plan.
The single most important piece of advice you’ll ever get is to "start low and go slow." When I say low, I mean incredibly small. A common starting point is an amount about the size of a half-grain of rice. This tiny dose lets your body get acquainted with the oil's potency without feeling overwhelmed.
From that first dose, it's all about patience. You'll want to see how your body responds over a few days before even thinking about increasing the amount. This methodical process, often called titration, is the secret to discovering the minimum effective dose that works for you.
Finding Your Personal Dosing Sweet Spot
There's no magic number when it comes to dosing cannabinoid oil—everyone is different. Your ideal regimen will be built on consistency and, most importantly, listening to your body. Think of it as a conversation.
Keeping a simple journal is one of the most effective ways to manage this. Just jot down the time, the amount you took, and how you felt. Over time, this log becomes your personal roadmap, giving you the data you need to make smart adjustments and track your progress.
To make things a bit easier, you can use tools built for this purpose. We've put together a guide that includes a helpful RSO dosage calculator to help you map out your starting dose and plan gradual increases responsibly.
How to Properly Store Your Oil
Once you've finished your batch, you need to protect it from its three biggest enemies: light, heat, and air. Exposure to any of these will degrade the cannabinoids and terpenes, stripping the oil of its potency and quality over time.
Stick to these simple rules to give your oil the longest possible shelf life:
- Go Airtight and Opaque: Oral syringes are perfect. They keep air out and make dosing incredibly easy and precise. Small, dark glass jars with good seals are another solid option.
- Keep It Cool and Dark: For oil you plan to use soon, a medicine cabinet or a drawer—anywhere away from heat and light—will do the trick.
- Refrigerate for the Long Term: If you want to keep your oil potent for up to 12 months or even longer, the refrigerator is your best bet.
Creating a stable environment for your oil is non-negotiable. It ensures the last dose from the batch is just as good as the first, which is the cornerstone of any successful, long-term wellness plan.
The sheer scale of the cannabis extract market shows just how powerful these products are. Projections show the market growing at a 21.3% CAGR, jumping from $10.38 billion in 2024 to $12.6 billion in 2025. North America leads the charge with a 55% market share, driven by sophisticated extraction tech. While commercial producers use massive closed-loop systems, making your own can slash costs by up to 70% compared to buying retail. You can discover more insights about these market trends to see the full picture.
Here at RSOhelp.com, our mission is to give you the knowledge you need to use this oil responsibly. When you combine a well-made oil with intelligent dosing and proper storage, you’re creating a powerful tool for your health.
Common Questions About Making Cannabinoid Oil
As you get into making your own cannabinoid oil, you're bound to run into a few questions. It happens to everyone. Getting clear on these common points can make the difference between a successful batch and a frustrating one, so let's tackle them head-on.
Think of this as a quick-reference guide to reinforce the safety and quality principles we've already covered. Knowing the why behind each step is just as important as knowing the how.
Why Is My Oil So Dark and Thick?
This is probably the number one question I get from first-time makers. They see this incredibly dark, almost black, thick oil and worry they've done something wrong.
Relax, that's exactly what you want to see. A properly made, full-spectrum oil using an ethanol wash is supposed to look like that. The dark color is a good sign—it means you've successfully extracted a rich profile of compounds from the plant, not just isolated cannabinoids. Its thick, tar-like consistency when cool shows that you've purged the solvent correctly. If your oil is runny at room temperature, that's a red flag that it might still contain residual alcohol.
Don't confuse dark for dirty. Commercial distillates are often light amber because they've been heavily refined to isolate specific cannabinoids. A true full-spectrum oil is naturally dark, reflecting its complete and potent plant profile.
Can I Reuse My Solvent?
Technically, you can, but I strongly advise against it. If you're serious about making a clean, high-quality product for your health, reusing ethanol is just a bad idea.
Every time you wash plant material, the alcohol picks up more than just cannabinoids—it also grabs things like chlorophyll and plant waxes. Reusing that solvent means you're intentionally introducing those impurities from your last batch into your new one. This will absolutely impact the final purity and taste of your oil.
For the best and safest results, always start with fresh, clean, high-proof food-grade ethanol. The cost of new solvent is minimal compared to the peace of mind you get from a clean, pure final product.
What Happens If I Don't Decarboxylate?
Simply put, your oil won't work. Skipping the decarb step is one of the most common and critical mistakes you can make.
Raw cannabis is full of cannabinoid acids, like THCA and CBDA. In this form, they're not fully active in the way most people expect. Decarboxylation is the gentle heating process that chemically converts them into the active compounds we know as THC and CBD.
If you skip this, you're just washing inactive compounds into your oil. The final product will have very little potency and won't provide the effects you're looking for. Decarboxylation is the non-negotiable first step.
Is It Necessary to Filter the Oil Multiple Times?
A single, thorough pass through a fine-mesh strainer lined with cheesecloth does a decent job. But if you want to elevate the quality of your finished oil, filtering a second time is a simple step that pays off.
The goal here is to remove every last bit of physical plant matter from the ethanol before you start the evaporation process.
- Your first pass will catch the big stuff—the bulk of the plant material.
- A second pass through a fresh piece of cheesecloth or an even finer screen will trap the tiny particles that slipped through the first time.
Why bother? Because any plant bits left in the oil will essentially get "cooked" during solvent removal, which can create a harsh, bitter taste. It’s a small refinement, but it makes a noticeable difference in the final quality and aligns with our health-first approach.
Here at RSOhelp.com, our mission is to empower you with clear, safe, and reliable information. Whether you're troubleshooting your first batch or seeking to deepen your understanding of cannabinoid wellness, we are here to support you. For more guides and personalized support, we encourage you to explore the resources available.